Version v0.4.0 of the documentation is no longer actively maintained. The site that you are currently viewing is an archived snapshot. For up-to-date documentation, see the latest version.
Quickstart
Get Leoflow Lite running locally in two commands. Lite is the local edition (Pro is chart-installable and in validation — see Operating modes); run it on your machine or a trusted internal network — see Editions.
Prerequisites
- One of the following for the datastores:
- Docker running (preferred — Lite spins up
postgres:16automatically), OR - Nothing — Lite falls back to an embedded managed Postgres downloaded
under
~/.leoflow(no Docker, no system Postgres needed). See Editions § Datastores for the auto-selection logic.
- Docker running (preferred — Lite spins up
- Linux or macOS (incl. WSL2). No system Python needed — Lite installs a managed one. See Installation for details.
1 · Install
curl -fsSL https://raw.githubusercontent.com/neochaotic/leoflow/main/install.sh | sh
This installs the binaries to a directory on your PATH (e.g. /usr/local/bin)
and runs the setup wizard, which asks a few questions — press Enter to accept
each [default]:
- Where your DAGs live (workspace) — default
~/leoflow - How tasks run —
subprocess(each task as a process on this machine — simple, no Docker, recommended) ork8s(real pod-per-task on a local mini-Kubernetes — mirrors Pro, needs Docker). The wizard also accepts the friendly aliaseslocal(=subprocess) andcluster(=k8s). - Admin email — default
admin@leoflow.local
It then fetches a managed Python + the editor, creates your workspace, and prints
your admin password once (leoflow lite reset-password resets it):
── Leoflow Lite admin (save this — it is shown only once) ──
  user:     admin@leoflow.local
  password: tiger98
(Piping non-interactively, or re-running with an existing config, skips the
questions and uses the defaults — which are always printed, so you are never
guessing.) If the installer added a PATH line to your shell profile, open a new
terminal (or source it); installing to /usr/local/bin needs no reload.
2 · Run it
leoflow lite
That’s it. With no arguments, leoflow lite:
- scaffolds a starter DAG in your workspace (if it has none yet),
- brings up Postgres — Docker
postgres:16when Docker is present, else an embedded managed Postgres (no Redis required, see Editions), - starts the control plane and prints where to go:
✓ Leoflow Lite is ready
    open:    http://127.0.0.1:8088
    login:   admin@leoflow.local
    project: /home/you/leoflow
Open that URL, log in with the password from step 1, and the DAG shows up in the
Airflow-compatible UI. leoflow lite keeps running and hot-reloads on every
save — press Ctrl-C to stop.
Lite binds loopback by default. To reach it from your LAN, add --host 0.0.0.0 — the banner then prints your machine’s IP
(http://192.168.x.y:8088). It is honored only with a login configured, and
Lite is for trusted networks only — never the public internet.
3 · Trigger your first run
leoflow lite scaffolds a starter DAG on first boot, so there is something to run
right away.
Open http://127.0.0.1:8088 and log in — the scaffolded DAG is listed on the Dags page.
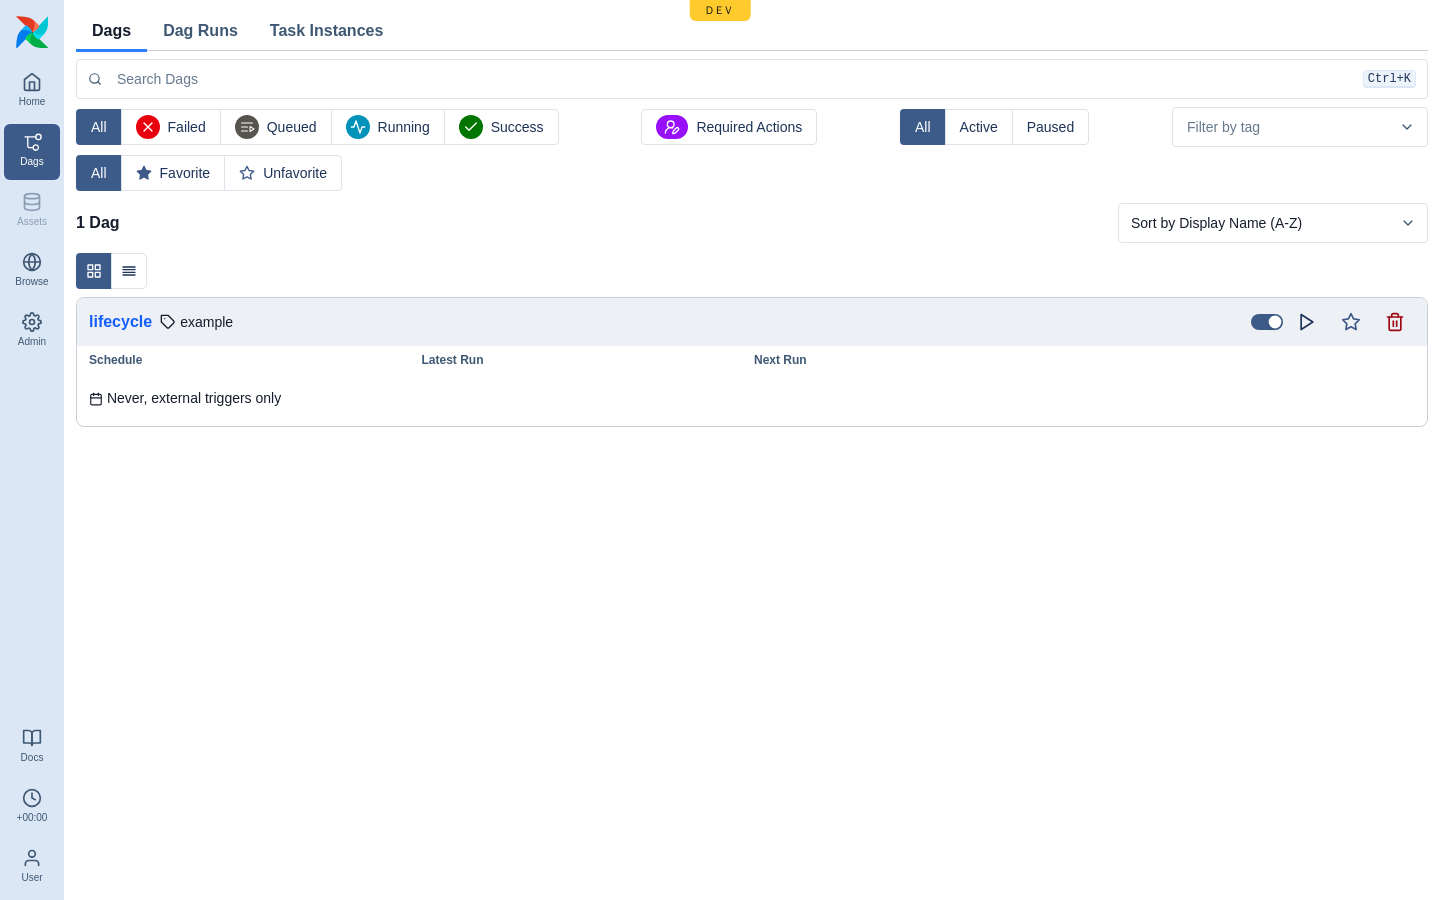
Click the DAG to open it, then press ▶ Trigger (top-right) to start a run.
Watch the grid fill in — each task goes yellow (running), then green (success). A fully green column is a successful run.
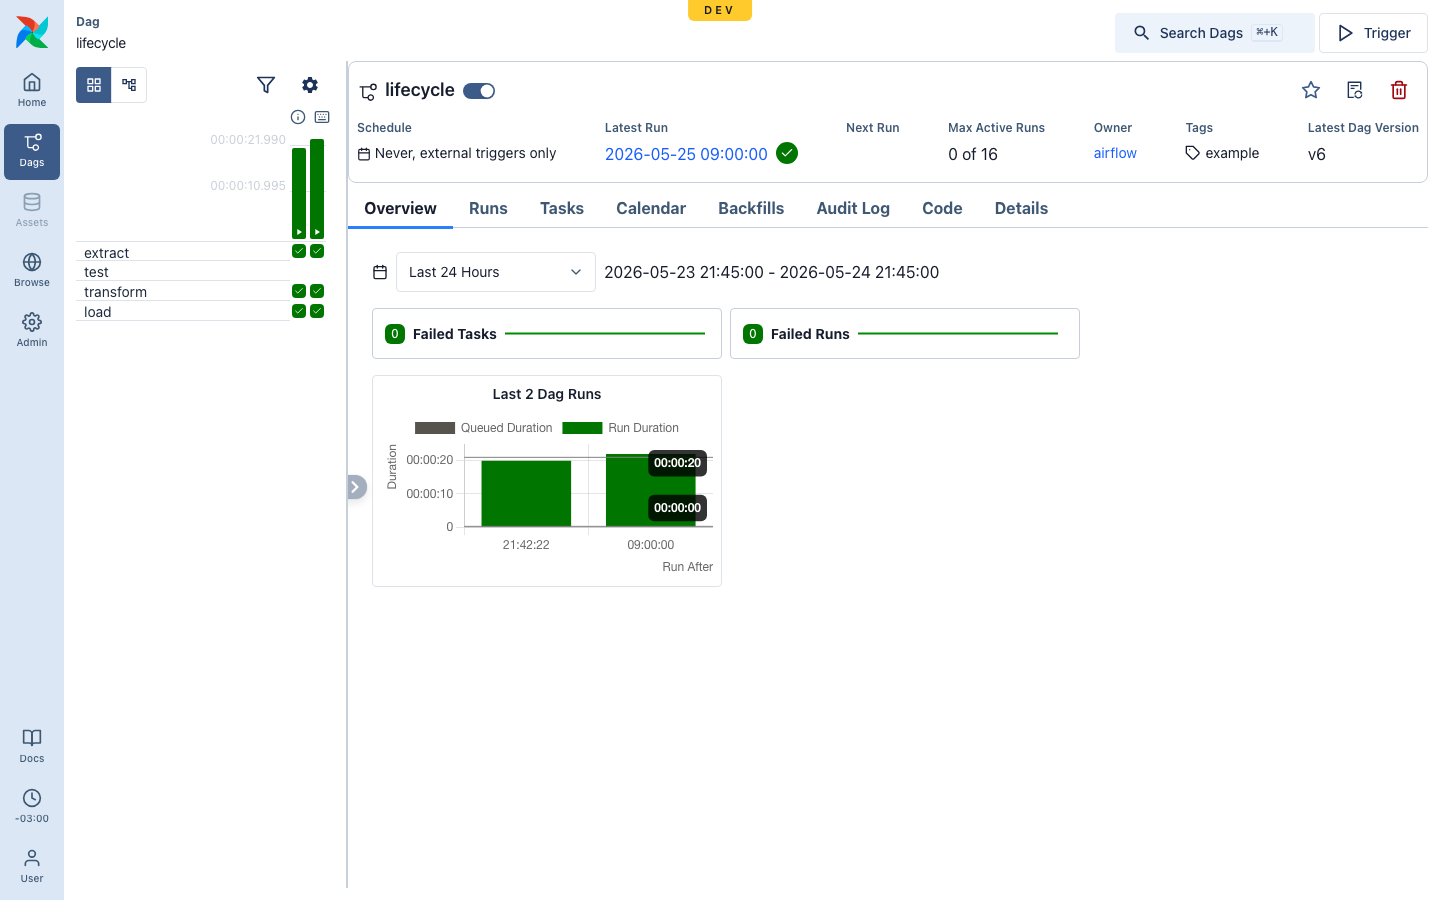
That is the whole loop: author, trigger, watch it go green.
4 · Edit your DAG
Click the < > IDE button (bottom-right of the UI) to open the built-in web
editor — file tree + Python/YAML highlighting. Edit dag.py, save, and the DAG
reloads in a couple of seconds. (Reload the browser tab to see structure
changes; run state auto-refreshes.) Details: the Lite web editor.
Useful commands
leoflow doctor                       # check platform, deps, and what's achievable
leoflow lite --host 0.0.0.0          # reachable from your internal network
leoflow lite reset-password     # set a new admin password (after first run)
leoflow uninstall                    # remove the install (--purge for workspace + volumes)
Next
- DAG authoring — the dialect,
leoflow.yaml, overrides. - The
leoflow liteworkflow — the edit→reload loop, executors. - CI/CD & deploy examples — ship it.
- Editions — Lite (now) vs Pro (in validation).